


WebStation is the name of the Synology web server.
With it, you can host on your server dynamic websites using for example the programming language php.
Installing WebStation will be required if you plan to install applications like phpMyAdmin, WordPress (french post) or create a personal website on your Synology NAS.
Enabling Web Station
DiskStation Manager version used in this article is 5.2
This article was translated by a machine from this post written in french : Synology : Activer WebStation
Go into your nas Control Panel, and then into Web Services. Then check the box Enable Web Station.
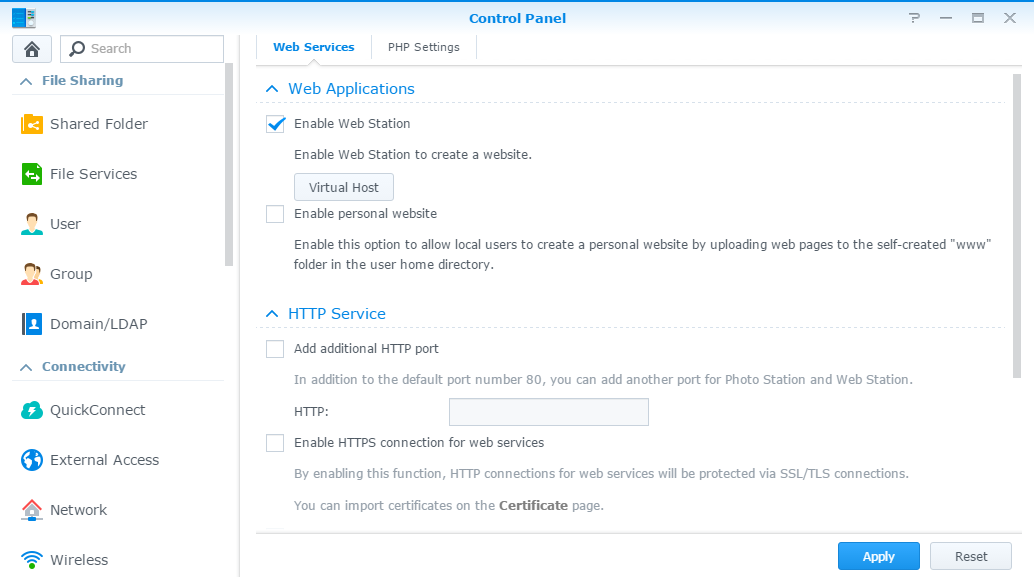
Enabling WebStation
Confirm via the Apply button.
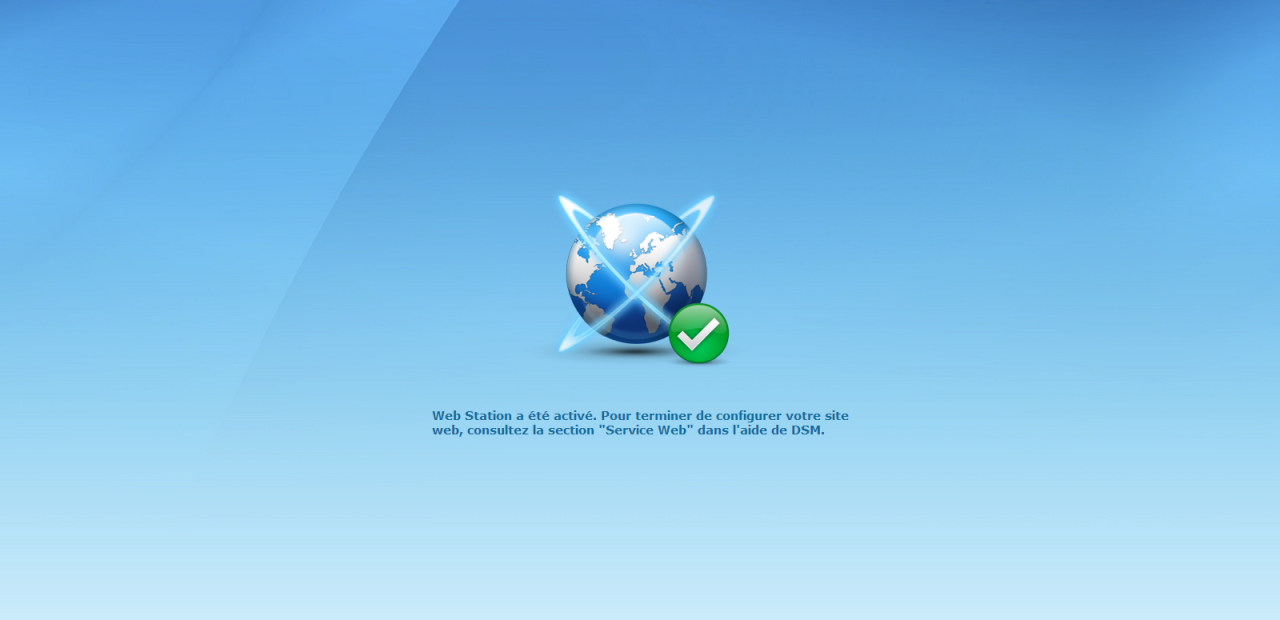
The NAS web server is now active. A web folder was automatically created in the root of your volume.
You can access the home page of Web Station by entering the IP address (or name) of the server in a browser: http://[your-ip]/
Web packages will be installed directly into that folder.
Your nas is ready to host sites!
Activating personal sites
Web Station allows you to create a www folder for each user on the NAS.
To do this, simply activate the Enable personnal website option in the Web Services tab of the control panel.
A www folder is automatically created for each user. To access this private space from your browser, add the name of the user with a ~ (tilde) in the address: http://[your-ip]/~Name/ (note case sensitive, Linux makes the difference between an upper and lowercase).
Using subdomain with Web Station
WebStation also allows you to use subdomains to access different sites on your NAS.
You have to give the subdirectory name and host name used to access the site.
For example, this blog uses a subdomain to access the site WordPress (french post). The image below illustrates this example:

List of virtual hosts – Synology Web Station
Enable Web Station server logs
Behind Web Station is hiding an Apache server.
Follow this tutorial to enable Apache access logs (french post).
Bonjour,
j’essaye d’activer les sites personnels.
Donc et bon de ce coté mais je n’arrive pas à y accéder meme en faisant monip/~Nom(du user).
J’ai regardé d’autres sites ou il était indiqué qu’il fallait changer dans : /etc/httpd/conf/extra/httpd-userdir.conf-user.
Remplacer :
par :
et ensuite redémarré le serveur apache mais rien n’y fait meme après un redémarrage NAS.
Serais-tu m’aider?
Bonjour,
Je ne vais pas pouvoir t’aider, je suis loin de mon NAS pendant 2 semaines…
Est-ce que le firewall autorise le trafic sur le port 80 ?
Est-ce que le nom de l’utilisateur est correctement orthographié ?
Quel est le code de retour envoyé par le serveur web ? (Firebug sur Chrome et Firefox peuvent te donner cet info. F12 pour afficher la console)
Est-ce que tu as tenté de créer une simple page index.html ?
Bon courage dans tes recherches
Julien
Oui tout ceci était déjà fait sauf la vérification du code. Erreur 403.
Oui j’ai créé une page toute simple avec juste un H1. Mais ça m’affiche à la place l’erreur de page non trouvé de synology.
C’est bon grâce à toi, j’ai pu donc résoudre le soucis qui était un soucis de droit sur les fichiers!
Merci beaucoup pour l’info.
Bien cordialement.
Bonjour,
Merci pour ces informations utiles sur l’utilisation des hôtes virtuels. J’espère que vous pourrez m’aider à résoudre le problème suivant que je rencontre avec l’utilisation des hôtes virtuels pour WordPress.
Configuration
-Freebox révolution avec IP fixe ports 80 et 443 routés en tcp sur le NAS
-Synology DS212J dernière version de DSM installée, Web server activé avec https
-Wordpress installé normalement par le centre de paquet (répertoire wordpress situé dans répertoire web)
-je n’ai pas changé pour le moment (pour ne pas compliquer la résolution du problème actuel) l’adresse web de WordPress ainsi que l’adresse web du site, j’ai cru comprendre aussi que cela n’était conseillé
-nom de domaine chez 1&1: appelons le mondomaine.fr avec un sous domaine tutu.domaine.fr tous les deux redirigés vers l’IP fixe de ma Freebox
-hôtes virtuels définis dans Web server sur le Synology : dossier=wordpress, hôte=tutu.mondomaine.fr http=80 (ou 443)
Quand j’accède par https://www.mondomaine.fr/wordpress (même chose avec le sous domaine) j’arrive bien à la page d’accueil de mon blog WordPress.
Quand je tape https://www.mondomaine.fr j’arrive à la page d’accueil de Web server. J’ai essayé en retirant www mais rien n’y fait.
J’ai lu de nombreux articles sur le sujet mais sans pouvoir résoudre le problème.
Avez vous des idées ?
Cordialement.
Bonjour Jean-François,
Si je comprends bien votre problème, vous souhaitez rediriger https://www.mondomaine.fr et https://mondomaine.fr vers https://tutu.domaine.fr ?
Est-ce bien cela ?
Mon besoin de départ est de permettre l’accès à mon blog WordPress hébergé sur mon Synology dans le sous répertoire wordpress (dans répertoire web) en tapant https://www.tutu.domaine.fr
Dans votre premier message, vous parlez de tuto.domaine.fr et non pas de http://www.tutu.domaine.fr
Avez-vous bien mis en place une règle dans la zone DNS pour l’entrée http://www.tutu ?
Est-ce que l’hôte est bien configuré sur http://www.tutu.domaine.fr ?
Chez 1&1 j’ai mis en place une redirection http de mondomaine.fr vers http://www.domaine.fr et de tutu.domaine.fr vers http://www.tutu.domaine.fr; sur le synology j’ai défini plusieurs hotes virtuels contenant http://www.domaine.fr et http://www.tutu.domaine.fr
Quand vous parlez de règle dans la zone DNS pour l’entrée http://www.tutu cela doit il se faire aussi chez 1&1 car je ne vois pas ou et comment cela se gère exactement.
Merci.
Un grand merci pour votre aide. J’ai bloqué les accès entrants sur ma Freebox et je peux maintenant accéder en http à mon blog en tapant https://mondomaine.fr
Cordialement
Bonsoir,
J’ai une question toute bête. Je possède un syno ds 413 et je voudrais crée un site web avec un logiciel commercial ( magix web designer ) est-ce possible ?
A pars l’activation du serveur web du syno y’a t’il d’autres paquet à activer.
Cordialement
Bonjour,
Il faut créer un répertoire dans le dossier www de votre volume puis y déposer les sources du site.
Vous pouvez ensuite y accéder en ajoutant le nom du répertoire dans l’adresse : http://[ip]/repertoire/
Cordialement,
Julien
Je vous remercie de votre réponse
Cordialement
Pascal
Bonjour,
Merci pour votre blog très intéressant. Je ne trouve pas l’information suivante :
J’ai un domaine chez OVH et une Freebox V6.
Lorsque j’entre le nom de domaine, je tombe sur le DSM. Bien sûr, si je change la redirection de ma box, je tombe sur le site Internet hébergé sur mon NAS.
Question :
Comment faire pour avoir les 2 sur la même ip sachant que je ne peux pas mettre de ports dans les redirection chez OVH ?
J’espère avoir été clair.
Merci
Bonjour,
Merci, n’hésitez pas à partager les articles sur les réseaux sociaux et à vous abonnez au blog ;-)
Pour vous connecter à DSM depuis votre nom de domaine, il faut spécifier le numéro du port :
http://www.votredomaine.fr:5000/ -> DSM
http://www.votredomaine.fr:80/ -> Le serveur web du NAS
Julien
Bonjour,
L’article étant assez ancien je tente ma chance
Je suis en DSM 6.0 et n’ai pas d’icône Services web malgré l’install de Web Station
D’avance merci
Bonjour,
Sur DSM 6, Web Station est une application à part entière. Vous pouvez y accéder à partir du menu.
Je vais mettre à jour l’article.
Merci pour votre commentaire.
Julien
Bonsoir,
J’avais jeté une bouteille à la mer, j’ai trouvé entre-temps
Dans tous le cas merci pour la réponse belle preuve de suivi de vos articles.
Bonsoir Julien, merci pour toutes ces aides.
J’ai passé l’aprem dessus et je viens enfin de réussir à accéder à mon worldpress.
Juste merci :-)
Bonjour Julien, tout d’abord merci pour ce blog.
J’ai un NAS DS216j et je n’arrrive pas avoir accès aux pages web des utilisateurs (IP_NAS/nom_user/).
J’ai bien mis une page basique index.html a la base du répertoire www de l’utilisateur, mais j’ai une erreur 404.
J’ai bien le site du NAS qui fonctionne… je sèche la…
Merci d’avance.
Bonjour Julien,
Compliqué a expliquer mais je vais essayer.
Sur mon NAS j’ai configuré un GIT, et mon problème actuelle est pour héberger GITLIST sur le nas avec un sous domaine.
J’ai un domaine (et un hébergement pour le moment) chez OVH que l’on peut appeler mondomaine.com pour plus de comprehension.
J’aimerai pouvoir accédez a gitlist avec un sous domaine “git.mondomaine.com”.
Cependant je suis complètement perdu..
J’arrive à accéder a la page d’accueil du dossier générer par default “web” en rentrant l’adresse ip du NAS en supprimant le port 5000 (qui lui me redirige sur le DSM).
As-tu une idée pour accéder au gitlist ce trouvant dans un dossier nommé “Sources”, puis de le mettre en sous domaine comme cela : http://www.git.mondomaine.com
Merci Infiniment !
Alex
Bonjour Gérald,
As-tu bien mis un tilde (~) avant le nom de l’utilisateur dans l’url ?
-> IP_NAS/~nom_user/
Julien
Bonjour Alex,
Tu dois créer un hôte virtuel pour pouvoir accéder au sous domaine, regarde la dernière partie du tuto.
Il faut également que tu configures la zone DNS de ton domaine pour faire pointer http://www.git.mondomaine.com vers ton NAS. D’ailleurs au passage tu peux supprimer les www ;)
Ensuite, je pense qu’à l’intérieur de ton réseau local, il ne trouvera pas ton sous domaine. Tu devras donc soit mettre en place ton propre serveur DNS soit modifier ton fichier hosts pour faire pointer http://www.git.mondomaine.com vers l’IP de ton NAS.
Bon courage à toi
Julien
Merci pour cette reponse rapide Julien.
Je suis encore moins serein qu’avant et donc un peu plus perdu. Je suis developpeur front end dans la vie et non administrateur reseau, voici le probleme ^^
J’essayerai de suivre ton conseil demain meme si je reste pessimiste sur la marche a suivre qui est tres flou pour moi.
Merci beaucoup pour la reponse en tout cas.
Bonne soirée !
Alex
Ps : Si jamais tu fais du depanage via team viewer contre remuneration je suis preneur :)
Merci Julien pour le “~”, je ne sais vraiment pas lire !
Bonjour, J’ai un site perso et n’ai donc pas en principe besoin de Word Press or, après avoir réglé les règles du pare-feu et de Virtual hosting et en chargeant l’adresse de mon site www. dans un navigateur, je tombe sur le panneau de configuration de Webstation et non sur les pages de mon site bien que dans le dossier racine figure bien un fichier index.html. Merci.
Bonjour,
Désolé de répondre tardivement …
Avez-vous réglé votre problème ?
Pour moi il s’agit d’un souci au niveau du virtual host.
Non, toujours pas.
La configuration de serveurs virtuels sous Apache ne provoque pas leur apparition magique dans la configuration du DNS. Il faut que leurs noms soient définis dans le DNS, et qu’ils y soient résolus sur l’adresse IP du serveur, faute de quoi personne ne peut visiter mon site Web. Il est possible d’ajouter des entrées dans le fichier hosts pour tests locaux, mais qui ne fonctionneront que sur la machine possédant ces entrées.
Configuration du serveur
# Apache doit écouter sur le port 80
Listen 80
# Toutes les adresses IP doivent répondre aux requêtes sur les
# serveurs virtuels
NameVirtualHost *:80
DocumentRoot /www/example.com
ServerName http://www.example1.com
# Autres directives ici
DocumentRoot /www/example.org
ServerName http://www.example2.org
# Autres directives ici
Que pensez-vous perso. de cette remarque ? Merci d’avance de votre message.
Bonjour Julien,
J’ai un Syno 710+ dont je souhaiterais mettre à jour les versions d’Apache et de PHP. En effet, je souhaiterai pouvoir installer la dernière version de Moodle (entre autre) qui nécessite, a minima PHP 5.6.
Je n’ai rien trouver sur le web. Je serai preneur d’un tuto.
En te remerciant par avance
Je ne comprend pas, j’ai installé web station sur synology DS415+, puis apache et php.
J’ai installé des sites et tout fonctionnait bien, tout d’un coup, il y a une semaine : erreur 403 sur tous les site. depuis j’ai désinstallé puis réinstallé web station, apache et PHP et toujours erreur 403.
de plus web station n’apparait pas dans les applications du panneau de configuration, incompréhensible. j’ai désactivé tous les firewall, mon routeur est correctement configuré (comme il fonctionnait auparavant)
Je ne comprend rien
Bonjour,
Une erreur 403 indique un problème de droit d’accès.
Consultez les logs d’erreur du serveur pour identifier la cause du dysfonctionnement.
Cordialement,
Julien Nicole
Bonjour,
Suite à la MAJ de la WebStation, mon erp (en php) est inaccessible.
A priori, le serveur apache a l’air down.
Quand j’ouvre l’interface, sur paramètres généraux, les listes déroulantes sont vides… Comme si apache et php n’étaient pas installés ou démarrés.
Avez vous deja vu ce type de problèmes.
Si ca n’est pas le cas attention lors de la MAJ du package.
Un grand merci pour votre blog.
A priori c’est la version Beta qui était disponible qui a entrainé cela.
En downgradant je suis retombé sur mes pattes.
Merci à vous.
Bonjour Julien,
Tout d’abord merci pour ce blog, j’ai un DS115j avec WD 2T, version DSM 6.1.4
Je souhaite faire du dev web sur le nas avec PHP/mariadb10, j’ai installé les dernières versions de :
– PHP7 ( la version 5.6 avait été installé par défaut)
– mariadb10
– phpadmin
– Apache server 2.4
– web station
Dans les paramètres généraux j’ai mis :
– Serveur principal HTTP : Apache HTTP Server 2.4
– PHP : Défaut Profile (PHP 7.0)
Dans l’onglet “Paramètres généraux” je n’arrive pas à activer un site Web personnel, et bien sûr dans l’onglet “Statut”, l’état du site Web personnel est “Désactivé”
en complément nginx est aussi installé
Aurais tu une idée, merci d’avance
Bonjour, je cherche désespérément une solution. Car j’ai pu configurer correctement web station. Mais lorsque je veux accéder de l’extérieur au site web avec le VPN actif, ça ne fonctionne pas! Si je désactive le VPN aucun problème. J’ai test avec un ddns, mais également via,l’ip direct afin de ne pas risquer de passer par l’ip reçu du VPN. Merci d’avance pour toute l’aide que vous pourrez me donner.
Bonjour
Essayez d’installer le serveur dns derrière le vpn. Vous pourriez ainsi modifier la zone dns associée au site, et renvoyer le trafic en interne au lieu de passer par le web
Bonjour Julien Nicole,
Je suis parvenu entre temps à trouver la solution. J’ai du activer les passerelles multiples pour que ça puisse fonctionner.
Merci d’avoir pris le temps de répondre.